What is Teamspeak?
Teamspeak is a VoIP software mostly used by videogame players to communicate to each other by talking instead of typing. Using a VoIP (Voice over IP) app is crucial when playing multiplayer games with your friends without having to type in order to talk.
Prerequisites
You will need the following tools in order to create your own Teamspeak server:
- An SSH client – Putty is simple and light
- A vps with Ubuntu/Debian linux – get one from MVPS.net
- 10-15 minutes of your time
Installation
First off, ensure your VPS is up to date with the latest and greatest plus 2 tools:
apt update && apt -y dist-upgrade && apt -y install wget screen && apt -y autoremove && reboot
*The connection will drop until the VPS is rebooted. Reconnect to the VPS.
Secondly, go to the Teamspeak Download site > Choose Server > Click on the x64 version clipboard to get the download link:
wget http://dl.4players.de/ts/releases/3.4.0/teamspeak3-server_linux_amd64-3.4.0.tar.bz2
*Actual version might differ in the near future so make sure to double-check the commands after downloading.
Unpack the archive:
tar -xvf teamspeak3-server_linux_amd*.tar.bz2
Enter the unpacked folder:
cd teamspeak3-server_linux_amd64/
In order to run Teamspeak, you must first agree with their license. This can be done by creating a single file:
touch .ts3server_license_accepted
Some ports should be opened in case you’re running a firewall:
ufw allow 9987/udp
ufw allow 10011/tcp
ufw allow 30033/tcp
*Complete list of ports should be visible when running teamspeak.
How to run the Teamspeak server
Open a new screen using the screen app so Teamspeak runs in the background:
screen
press enter
Time to run the Teamspeak server:
sh ts3server_minimal_runscript.sh
Pay extra attention to the info shown after running the script. It contains the login details and privilege key which will be required when connecting to the server itself.
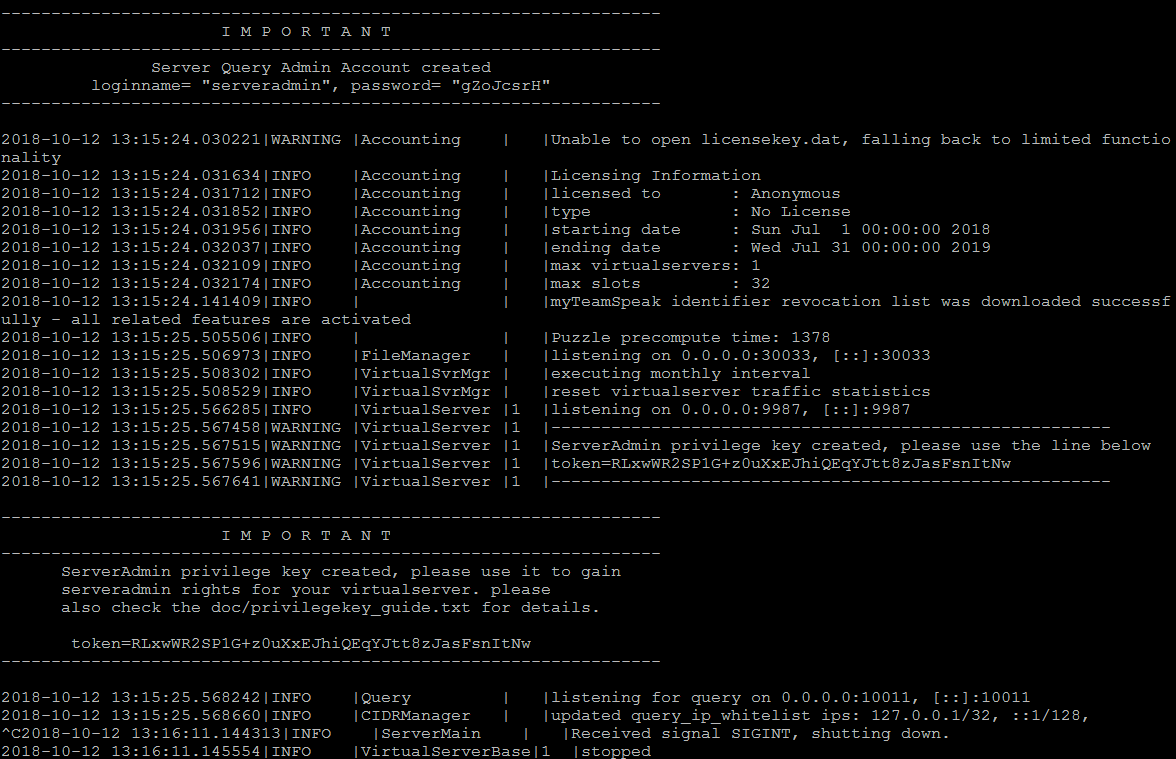
Copy the shown info to a notepad and leave the screen running by detaching from it:
Press Ctrl+a+d
You have now detached from the session where the teamspeak server is running. There are plenty of ways to automate it to a certain degree but this is the most basic and easiest way to run it.
The final step
Remember the privilege key you noted down, it is needed after connecting to your Teamspeak server.
When connecting, you will be prompted to insert it. Simply copy and paste it and you should now have your very own Teamspeak Server.
*Keep in mind some limits are applied to the Free Version therefore consulting the official site would be the best way to go in case you want to expand.