
Fail2ban
Fail2ban is a very good tool for hardening linux against brute-force attacks. It works by checking logs and creating iptable rules once the rules are triggered.
The following guide is for Ubuntu/Debian who’s repos already provide the required pacakges. For CentOS/RHEL, epel-release repo must be installed first.
Update the packages and install fail2ban:
apt update && apt -y dist-upgrade && apt -y install fail2ban
Create a jail configuration file:
cp /etc/fail2ban/jail.conf /etc/fail2ban/jail.local
SSH might be included by default but just to make sure, it will be enabled manually.
Include SSH in the newly created jail:
nano /etc/fail2ban/jail.local
Scroll down to sshd and you should see the following config:
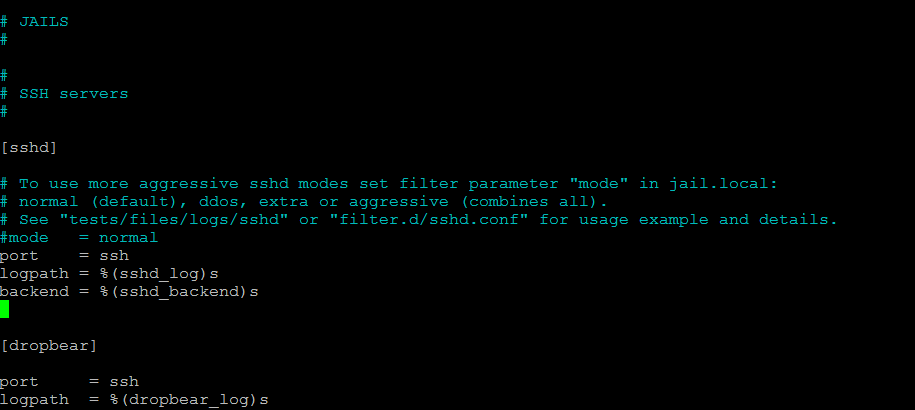
Change the configuration in order to enable sshd monitoring:
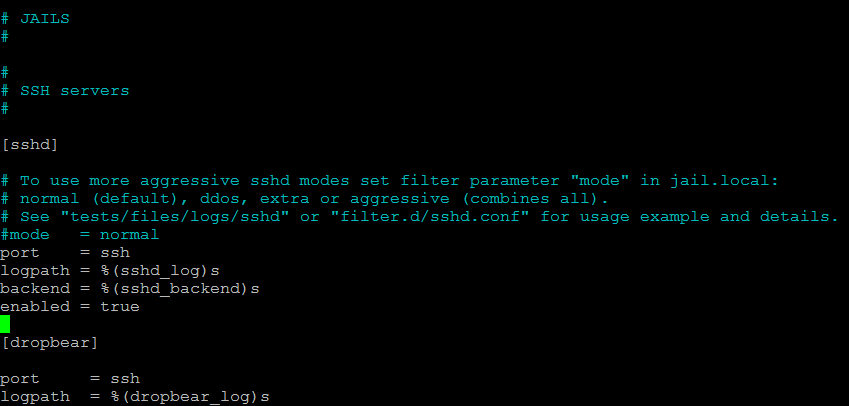
Restart fail2ban for the changes to come in effect:
service fail2ban restart
The configuration can be changed in order to reduce the failed logins from 5 to 3 but a bit risky in case you’re still using password authentication. The ban time of 10 minutes can also be increased or made permanent.
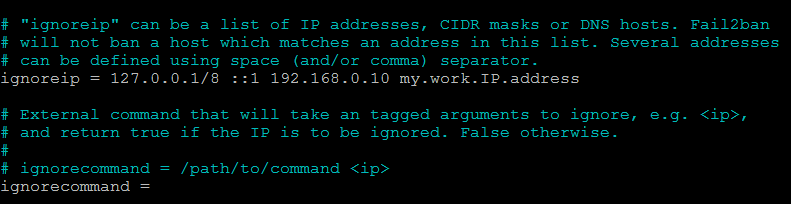
IP whitelist
If you wish to access your system from a specific IP address, you can use this feature to prevent getting locked out. To ignore a specific IP or IP range, look for ignoreip in /etc/fail2ban/jail.local , remove the # in front and add your IP or IP range:
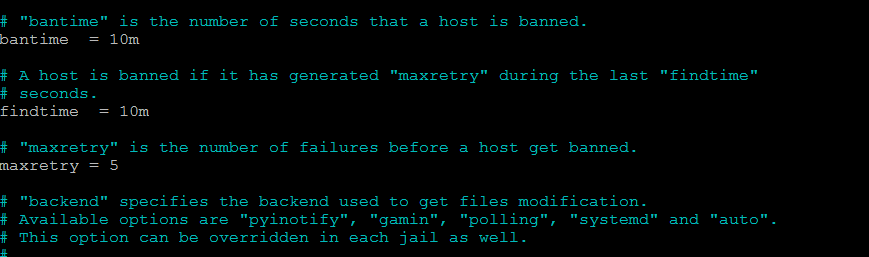
Bantime , maxretry and findtime
Another useful feature is the Ban time interval. Look for bantime in /etc/fail2ban/jail.local and change if needed.
Right next to it are 2 more useful options: maxretry and findtime. Maxretry is the number of failed logins required to trigger the ban and findtime is the time period during which the attacker triggered the maxretry interval.
Fail2ban is widely customizable , it can even cover wordpress and general http/https login to some extent but it should be not used as a replacement for a well configured firewall.